Portable North Pole Special
Posted on November 29, 2025 in 2024 Holiday Gift Guide
Make Christmas Magic with Portable North Pole Make this Christmas even more magical with Portable North Pole!
Without the chance to see Santa at the mall this year, Portable North Pole makes it easy to safely celebrate Christmas with Santa with up to 60+ messages ready to be personalized for your loved ones. Whether you’re sending a message to a child, a teenager, or even a grown-up, Santa will amaze everyone on your list! Stay comfortable in your own home and explore our collection of calls, video calls, and video message scenarios that make the perfect gift for your friends and family near and far – or even for large groups like your employees!
Additionally, you can make this Christmas even more exciting by trying online games and betting with Gates of Olympus casino. It’s a great way to add some thrill to the festive mood, especially if you’re staying home and looking for entertainment!
Using Portable North Pole is easy: Simply visit the PNP website or download the PNP mobile app, sign up, fill in a short form, and upload photos of your loved one. In just a few seconds, Santa is ready to greet them with a personalized message, addressing them by name, showing their photo, and in some select scenarios, even offering interactive opportunities for maximum fun!
A variety of our Premium video messages can be tried for free. PNP fans can also purchase a single Premium video for their loved one, or purchase our Magic Pass (which includes unlimited access to all Premium videos and calls for unlimited recipients)!
As always, our Premium features are the ultimate Christmas treat. From the Reaction Recorder to capture moments via a picture-in-picture video for a precious keepsake to playing fun games on the PNP mobile app (like our Dancing Elf game) and our brand-new Christmas Eve multi-device scenario with a magical live call from Santa, there’s Christmas magic for everyone with Portable North Pole.
Bring the Magic of Christmas to Life with Portable North Pole! Spread joy and wonder safely with your loved ones this holiday season! For a limited time, get a FREE personalized video message from Santa – straight from the North Pole. And while you're soaking up the festive spirit, why not turn up the fun? Take a break and play Chicken Road game – the perfect way to add laughter, surprises, and a little holiday adventure to your celebrations!
https://www.portablenorthpole.com #PNPSanta
Nearly Natural Christmas Tree Giveaway (Ends 12/31) #NearlyNaturalChristmas Ends 12/31 @HomeJobsByMom
Posted on November 29, 2025 in Giveaways
Welcome To The Nearly Natural Christmas Tree Giveaway!
This giveaway is part of our Holiday Gift Guide. Stop by to see all the great giveaways and products!
Create a traditional Christmas scene with this Northern Tip Pine Artificial Christmas Tree!
GIVEAWAY DETAILS

One Lucky Winner Will Receive A Nearly Natural 8ft Northern Tip Artificial Christmas Tree with 450 Clear LED Lights!
Prize:

Nearly Natural 8ft Pre-Lit Christmas Tree
Completely maintenance-free, it boasts multiple tiers of evergreen foliage made up of 1500 bendable branches for showcasing your favorite ornaments. Pre-strung with 450 clear LED lights and stabilized on an accompanying stand, this 8’ tall artificial Christmas tree will ensure your home is always seasonally attired for years to come.
Available on Amazon
Hosted By:
Home Jobs By Mom
Co-Hosted By:
Deliciously Savvy & Michigan Saving And More

Sponsored By:
WEBSITE ~ FACEBOOK ~ INSTAGRAM ~ PINTEREST
Read the Review
Rules: Use The Rafflecopter Form To Enter Daily. Giveaway Ends 12/31 And Is Open To The United States. Entrants Must Be 18 Years Old To Enter. The Winner Will Be Notified Via Email.
Are You A Blogger? CLICK HERE To Get A FREE Link Added To One Of Our Giveaways. Just Post And Report!
If You Have Any Questions Or Are A Brand/Company And Would Like To Work With Home Jobs By Mom Please Contact Me. Also, To Be Informed Of New Giveaways And Blogger Opps CLICK HERE.
Good Luck! Enter Below
One entrant will be selected by the entry form to win a Nearly Natural Christmas Tree. Open for entry in the United States, 18 years and older from 011/24/20 thru 12/31/20. No purchase necessary. Void where prohibited. This giveaway is in no way endorsed, affiliated, or associated with Facebook, Twitter, or any other social media networking site. The winner will have 48 hours to respond to the notification email to claim their prize or a new winner will be selected. Once a winner is drawn and confirmed, the name will be announced on the Rafflecopter form. Nearly Natural will be responsible for sending the winners their prize.
Thank You So Much For Visiting Today!
PicturesOnGold.com Customized Sterling Silver Heart Locket Giveaway! Ends 12/26
Posted on November 26, 2025 in Giveaways

Sponsored
By: PicturesOnGold.com
Hosted By: Love, Mrs. Mommy
Winner Will Receive:
A Beautiful Sterling Silver 2 Photo Heart Locket w/ 18″ Box
Chain
from PicturesOnGold.com
worth $140+!
Can’t wait to see if
you won? I have a coupon code for 10% OFF your order!
Just use “FESTIVE10” at checkout on
PicturesOnGold.com!
~*~*~*~

Love, Mrs. Mommy’s PicturesOnGold.com
Review:
Pictures On
Gold has a large collection of customizable jewelry. They carry
everything from heart lockets to medical ID bracelets. You name it, they
have it, and you’re going to love the beautiful, customized necklace I
made… (now don’t judge me)… for myself, haha!
I’ve been making
beautiful necklaces for my family, but had been neglecting myself. After
all, sometimes we Moms need a special treat once in a while. So go ahead…
nudge, nudge, buy yourself something, too!
review!
make the perfect Holiday Gift!
 PicturesOnGold.com will go even further to
make sure your gift is perfect. They will make sure that your photos fit
perfectly, no matter their size, and if there is awkward spacing in the
photo, they’ll enhance the photo to eliminate blank space.
Often, they can even remove the background of a photo, leaving your loved
ones front and center in your favorite photo. The laser engraving is
100% waterproof & scratch-proof and is guaranteed for a
lifetime!
must be 18+ to enter
Giveaway Dates ~ 11/26 9:00 AM EST
through 12/26 11:59PM EST
Good
Luck!!
Love, Mrs. Mommy and all participating bloggers are not held
responsible for sponsors who do not fulfill their prize
obligations. This giveaway is in no way endorsed or sponsored by Facebook
or any other social media site. The winner will be randomly drawn by
Giveaway Tools and will be notified by email. Winner has 48 hours to
reply before a replacement winner will be drawn. If you would like to
participate in an event like this please contact LoveMrsMommy
(at) gmail (dot) com.
New Animated Series “Puffins” Stars Johnny Depp
Posted on November 26, 2025 in Animated Series
“Puffins” follows the adventures of a group of cute little birds, who work for the wily walrus Otto. The main characters of the series are five Puffins: Johnny Puff, voiced by Johnny Depp, Tic and Tac, Didi, and Pie. They live with a tribe of puffins in the vast and technological realm of Tana. The stories in the series will range from the bold missions of Otto, to multiple situations related to the small, fun problems of everyday life, addressing the issues of social impact in a childish way. They will cover positives themes in the show such as gender and race equality and environmental protection are among the important and universal issues addressed in the puffin community throughout the series. Amidst the absurd situations and hilarious gags, kids will be entertainingly introduced to these important themes resonating in society today.
Delilah Home 6pc 100% Organic Cotton Bath Towels Giveaway Ends 12/31 @DelilahHome @DeliciouslySavv
Posted on November 26, 2025 in Giveaways
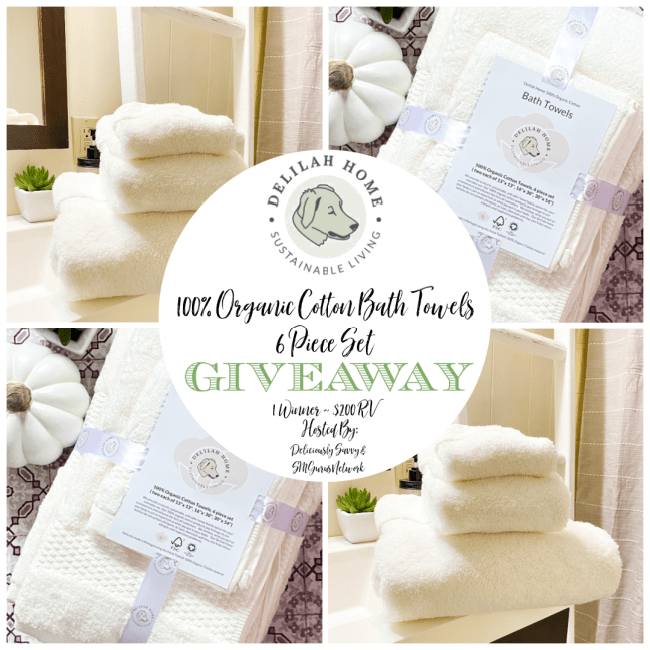
Welcome to the Delilah Home 6pc 100% Organic Cotton Bath Towels Giveaway!
1 Winner ~ $200 RV

This giveaway is part of our Holiday Gift Guide – Stop by to see all the giveaways and great products.
Host is Deliciously Savvy
Michigan Saving and More
~~~~~~~~~~~~~~~~~~~~~~~~
This giveaway’s Sponsor is:
![]()
WEBSITE ~ FACEBOOK ~ TWITTER ~ PINTEREST ~ INSTAGRAM
~~~
1 Lucky Winner win a 6pc set of Delilah Home 100% Organic Cotton Bath Towels! Winners Choice of Color ~ RV is $200!
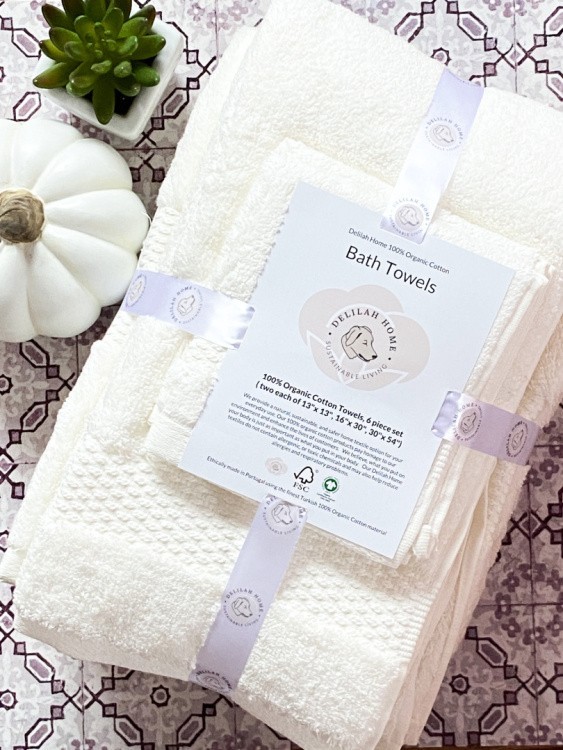
See review HERE.
~~~~~~

This giveaway/sweepstakes is in no way endorsed, affiliated, or associated with Facebook, Twitter or any other Social Media Networking Site. This Giveaway is valid to continental United States residents only, Entrants must be 18+ years of age to enter. This giveaway event will end at 11:59 PM (EST) 12/31/20. The winners will have 48 hours to email their information back to mcushing7 at hotmail dot com or a new winner will be drawn, you may want to put this email address as safe as it could go to spam. The giveaway is not valid where prohibited! By entering you are authorizing us to collect the information on the form below, this information is used only to contact the winner! No purchase necessary, Void where prohibited by law, and the number of eligible entries received determines the odds of winning. Winners are chosen randomly by the Giveaway Tools program. The sponsors are each responsible for shipping of the above prizes. No blog associated with this contest are responsible for prize fulfillment. If you would like to be a sponsor in a giveaway like this please email Melissa Cushing at mcushing7 (at)hotmail (dot) com. If you take an entry you must stay following for the entire contest or you will be disqualified.
Sponsors interested in joining our gift guides can see the information HERE.
Dr.’s REMEDY Nail Care Bundle Giveaway Ends 12/16 @las930
Posted on November 25, 2025 in Giveaways
Welcome to the Dr.’s REMEDY Nail Care Bundle Giveaway!
1 Winner Dr.’s REMEDY Nail Care Bundle
This giveaway is part of our Holiday Gift Guide – Stop by to see all the giveaways and great products.
HOST IS MICHIGAN SAVING AND MORE
~~~~~~~~~~~~~~~~~~~~~~~~
This giveaway’s Sponsor is:
WEBSITE ~ FACEBOOK ~ PINTEREST ~ INSTAGRAM
With a proprietary blend of biotin, tea-tree oil, anti-fungal garlic bulb extract, lavender, wheat protein and antioxidant vitamins, to deliver lustrous, lasting color while tackling everyday issues like dryness, discoloration and nail fungus.
~~~
1 Winner each receive the Dr.’s REMEDY Nail Care Bundle
Dr.’s REMEDY Nail Care Bundle Everlasting Evergreen Holiday Gift Set
$75 ARV
See review HERE.
~~~~~~
THE GIVEAWAY
This giveaway/sweepstakes is in no way endorsed, affiliated, or associated with Facebook, Twitter or any other Social Media Networking Site. This Giveaway is valid to continental United States residents only, Entrants must be 18+ years of age to enter. This giveaway event will end at 11:59 PM (EST) 12/11/20. The winner will have 48 hours to email their information back to las93063 at gmail dot com or a new winner will be drawn, you may want to put this email address as safe as it could go to spam. The giveaway is not valid where prohibited! By entering you are authorizing us to collect the information on the form below, this information is used only to contact the winner! No purchase necessary, Void where prohibited by law, and the number of eligible entries received determines the odds of winning. Winners are chosen randomly by the Giveaway Tools program. The sponsors are each responsible for shipping of the above prizes. No blog associated with this contest are responsible for prize fulfillment. If you would like to be a sponsor in a giveaway like this please email Laura Smith at las930 (at)gmail (dot) com. If you take an entry you must stay following for the entire contest or you will be disqualified.
Sponsors interested in joining our gift guides can see the information HERE.
Trendhim has The BEST Merchandise
Posted on November 24, 2025 in 2024 Holiday Gift Guide

![]()
I love the textured black leather belt, that we received, from Trendhim! It’s awesome. Has a wonderful fit, true to size. It’s comfort is unbelievable, and it’s style is outrageous. This is my favorite belt, by far, and it’s made to last. It’s true Italian leather, as well. My husband looks super sexy in this amazing belt!
There’s so many wonderful products, at Trendhim. Go over, and take a look. You’ll find everything in the picture, plus more. You will love this shop; I know I do. We will be shopping here for a long time. My hubby says he loves the style, the look, and the comfort.
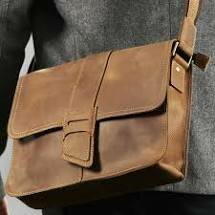
The Scuffed Brown Leather Satchel, above is so unique looking. Anyone can use it, and it’s greatly priced, and on sale. It’s got that rustic look, that I think is oh so sexy, and it’s got handy inside compartments, able to hold up to a 12″ laptop.
Trendhim is having a special sale. Hop on over to check it out. You will love these deals, in time for the Holidays. Offers are changing by the hour, so get on over, and check out their sales.
Connect with Trendhim: Shop | Facebook | Youtube | Instagram
Disclaimer:
This product was received from the Company for review purposes only. All thoughts and words in this post are my own and I was not paid to endorse it. I am only voicing my opinion about this product.
Holly Clegg trim&TERRIFIC Cookboook Giveaway Ends 12/31 @HollyClegg @DeliciouslySavv
Posted on November 24, 2025 in Giveaways
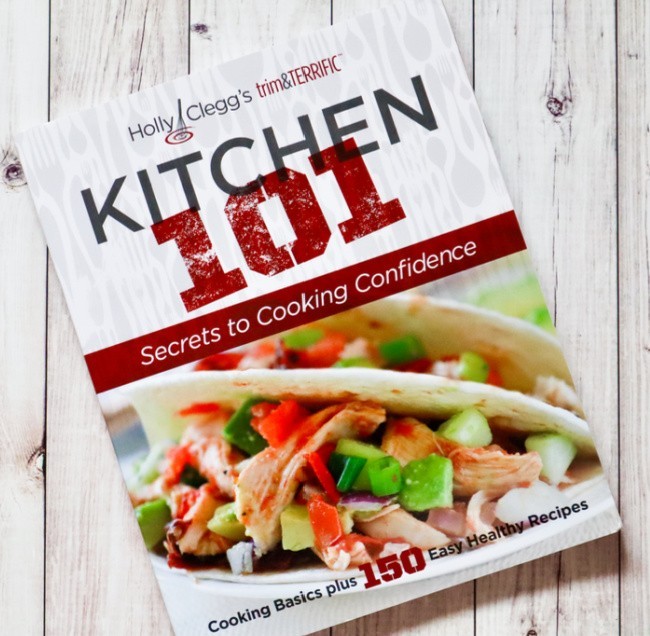
![]()
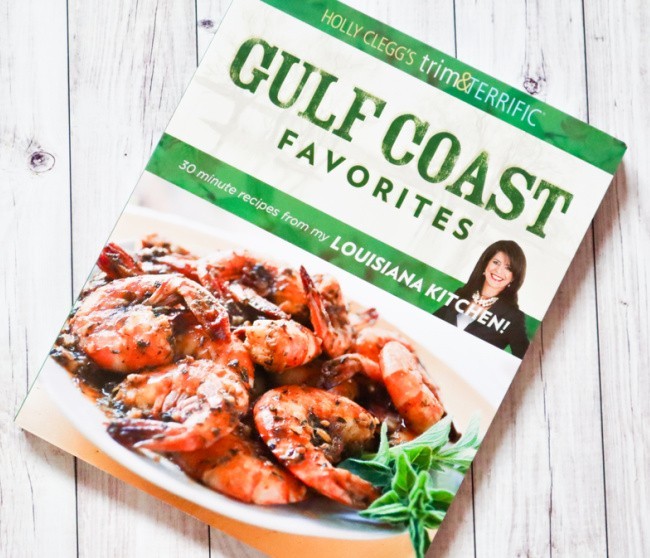
Welcome to the Holly Clegg’s trim&TERRIFIC Cookbook Giveaway!
2 Winners!
This giveaway is part of our Holiday Gift Guide – Stop by to see all the giveaways and great products.
Host is Deliciously Savvy
Michigan Saving and More
~~~~~~~~~~~~~~~~~~~~~~~~
This giveaway’s Sponsor is:
![]()
WEBSITE ~ FACEBOOK ~ TWITTER ~ PINTEREST ~ INSTAGRAM ~ AMAZON
~~~
2 Lucky Winners will each win a trim&TERRIFIC Cookbook from Holly Clegg ~ Tasty & Delicious Recipes Made Easy! 1 will win Gulf Coast Favorites & another will win Kitchen101!
See review HERE.
See Review HERE.
~~~~~~
This giveaway/sweepstakes is in no way endorsed, affiliated, or associated with Facebook, Twitter or any other Social Media Networking Site. This Giveaway is valid to continental United States residents only, Entrants must be 18+ years of age to enter. This giveaway event will end at 11:59 PM (EST) 12/31/20. The winners will have 48 hours to email their information back to mcushing7 at hotmail dot com or a new winner will be drawn, you may want to put this email address as safe as it could go to spam. The giveaway is not valid where prohibited! By entering you are authorizing us to collect the information on the form below, this information is used only to contact the winner! No purchase necessary, Void where prohibited by law, and the number of eligible entries received determines the odds of winning. Winners are chosen randomly by the Giveaway Tools program. The sponsors are each responsible for shipping of the above prizes. No blog associated with this contest are responsible for prize fulfillment. If you would like to be a sponsor in a giveaway like this please email Melissa Cushing at mcushing7 (at)hotmail (dot) com. If you take an entry you must stay following for the entire contest or you will be disqualified.
Sponsors interested in joining our gift guides can see the information HERE.
Winner’s Choice PeachSkinSheets (APV $65-105) Ends 12/12
Posted on November 24, 2025 in Giveaways
Welcome to the PeachSkinSheets Holiday Giveaway!
Sponsored by PeachSkinSheets & Hosted by Mommy’s Playbook
I LOVE PeachSkinSheets. They are so comfy, and cozy. You will love them too. Enter on the form below, and good luck!
Just like you, your friends and loved ones are home a lot more than usual right now. That means more time with the family, more cuddling watching movies, AND more time sleeping in! You want to be a great gift giver, right? Yes!!! Give a gift that allows for more of all of that! PeachSkinSheets are the perfect gift for any holiday, especially the holidays at the end of 2025 . Who knows, they may help your loved one wake up to the best new year of their life!

About PeachSkinsheets:
The Original PeachSkinSheets are GREAT for hot sleepers! Breathable, ultra soft, pill resistant and anti-snag bed sheets featuring thermal control and moisture management properties…warm sleepers stay cool, and cool sleepers stay cozy. The durable athletic grade performance SMART fabric wicks away moisture to keep you drier and more comfortable. Best of all, they have a luxurious 1500 Thread Count softness with a brushed PeachSkin finish on both sides. Available in Split King, Cali King, King, Queen, Full, Twin and XL Twin and XL Full.

Say goodbye to wrinkles! Nobody wants to climb into bed with wrinkly sheets. PeachSkinSheets sheets have a wrinkle release that is activated in the dryer on medium to medium/high heat (temperature depends on your dryer) in about 20 minutes after washing.
Are You Looking for a Sale?
Every month PeachSkinSheets offers fabulous savings on their Colors of the Month! During this time, three Colors of the Month are priced at a reduced rate. Prices start at $65.
P.S. I saw a Black Friday Deal posted on PeachSkinSheets social media today! Look for it on Facebook, Twitter, AND Instagram for more details!

ENTER TO WIN!
Winner’s Choice PeachSkinSheets
The giveaway is open US Only, 18+
The giveaway ends 12/12 at 1159 pm est
Be sure to come back daily for more chances to win.
a Rafflecopter giveaway
Mommy’s Playbook Giveaway Rules: No purchase necessary. This giveaway is Sponsored by PeachSkinSheets, and hosted by Mommy’s Playbook. Victoria and/or Mommy’s Playbook, Participating bloggers, are not responsible for prize fulfillment. Please allow 60 days for prize fulfillment. Physical address required for prize fulfillment; no PO boxes, US recipients only. By entering this giveaway you are giving the giveaway host and/or event sponsor permission to retain your email address for future communication, you may choose to opt-out of such communications at any time. This giveaway is not sponsored or endorsed by any social media outlet including, but not limited to, Facebook, Instagram, LinkedIn, Twitter, and Pinterest. Please contact Victoria (at) MommysPlaybook.com regarding any questions you have pertaining to this giveaway.

Nomad $100 Gift Card Giveaway Ends 12/15 @nomadgoods @las930
Posted on November 24, 2025 in Giveaways
Welcome to the Nomad $100 Gift Card Giveaway!
1 Winner Nomad $100 Gift Card
This giveaway is part of our Holiday Gift Guide – Stop by to see all the giveaways and great products.
HOST IS MICHIGAN SAVING AND MORE
~~~~~~~~~~~~~~~~~~~~~~~~
This giveaway’s Sponsor is:
Nomad is and always will be a company that prioritizes design and quality over everything else. One of the most important aspects to them when designing new products is they use the highest quality, longest-lasting materials available. They design all of their concepts from the ground up, rather than white labeling existing products. From the Horween Leather for their cases and Apple Watch straps, to the rugged Kevlar® construction of their cables, they choose materials that stand out and outlast. It costs more to do so, but the cost isn’t as important as the value that doing so creates.
~~~
1 Winner each receive the Nomad $100 Gift Card
Nomad $100 Gift Card
$100 ARV
See review HERE.
~~~~~~
THE GIVEAWAY
This giveaway/sweepstakes is in no way endorsed, affiliated, or associated with Facebook, Twitter or any other Social Media Networking Site. This Giveaway is valid to continental United States residents only, Entrants must be 18+ years of age to enter. This giveaway event will end at 11:59 PM (EST) 12/15/20. The winner will have 48 hours to email their information back to las93063 at gmail dot com or a new winner will be drawn, you may want to put this email address as safe as it could go to spam. The giveaway is not valid where prohibited! By entering you are authorizing us to collect the information on the form below, this information is used only to contact the winner! No purchase necessary, Void where prohibited by law, and the number of eligible entries received determines the odds of winning. Winners are chosen randomly by the Giveaway Tools program. The sponsors are each responsible for shipping of the above prizes. No blog associated with this contest are responsible for prize fulfillment. If you would like to be a sponsor in a giveaway like this please email Laura Smith at las930 (at)gmail (dot) com. If you take an entry you must stay following for the entire contest or you will be disqualified.
Sponsors interested in joining our gift guides can see the information HERE.
 https://thisfrugalfamily.closetomyheart.com